Setting up your first store
This guide walks you through creating your first OrderLyne store, from signup to a live storefront URL. The whole flow takes about 5 minutes if you have the basics ready.
Before you start
Section titled “Before you start”You’ll move faster if you have these ready:
- Your business name — this is what appears on customer invoices and emails. Use the name you’d write on a GST invoice if you’re registered, or just your brand name if you’re not.
- Your WhatsApp number — the number you want order alerts and customer messages to go to. We use this throughout OrderLyne, so use the one you’ll actively check.
- A rough idea of your niche — skincare, jewellery, streetwear, etc. We use this to recommend the right starting theme. You can change it anytime.
You don’t need products, photos, payment gateway details, or courier accounts to create a store. Those come later.
Step 1 — Sign up
Section titled “Step 1 — Sign up”Go to orderlyne.app and click Get Started. You can sign up with email or with Google.
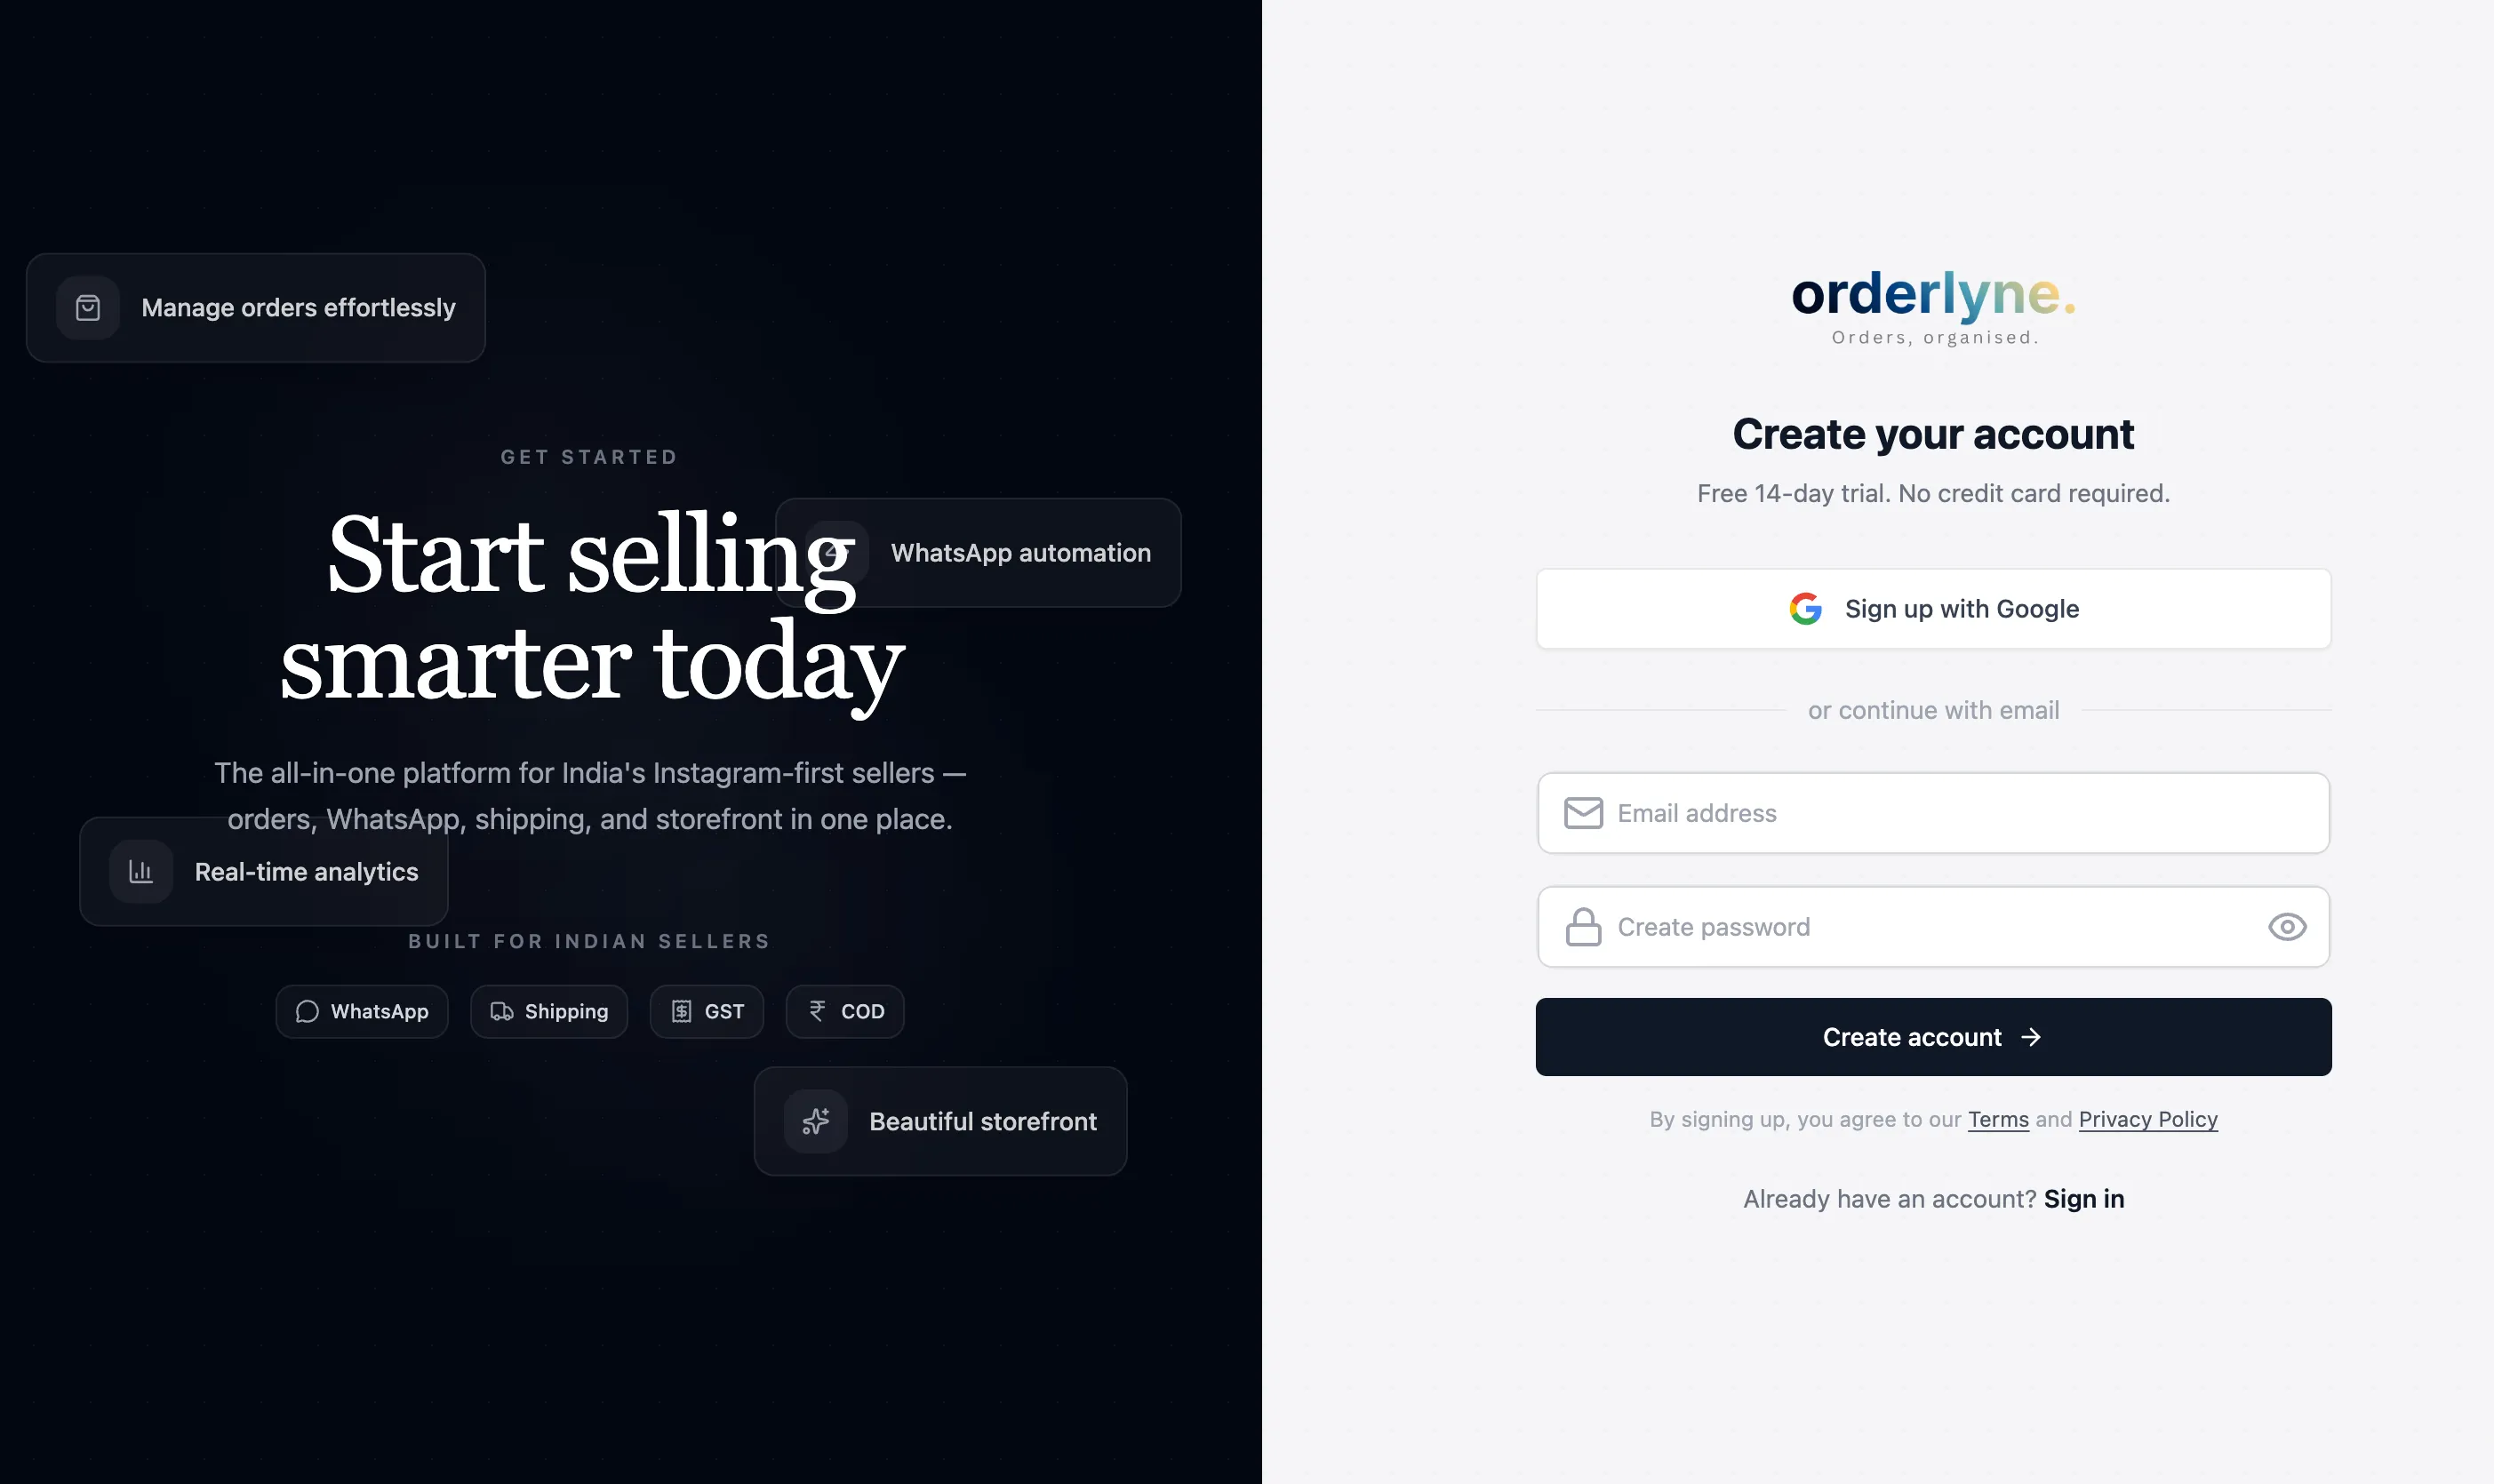
You’ll need:
- A working email address
- A password (8+ characters)
There’s no credit card required. You get a 14-day free trial that includes everything — managed WhatsApp, all couriers, full analytics, the works. We’ll only ask about a plan when the trial ends.
After you submit the signup form, you’re logged in immediately and dropped straight into onboarding. No “verify your email before you can do anything” loop.
Step 2 — Pick how you sell
Section titled “Step 2 — Pick how you sell”The first onboarding screen asks “How do you sell?” with two options:
- I sell on Shopify — connect your existing Shopify store via OAuth. OrderLyne will pull your products and orders, and add WhatsApp, Indian couriers, GST, and ad intelligence on top of your existing store.
- I don’t have a website yet — create a new branded storefront on OrderLyne. You’ll get a URL like
yourstore.orderlyne.into share in your Instagram bio, on WhatsApp, or anywhere else. You can also point your own custom domain (yourbrand.com) to your OrderLyne store later, so the OrderLyne subdomain is a way to launch immediately, not a permanent constraint.
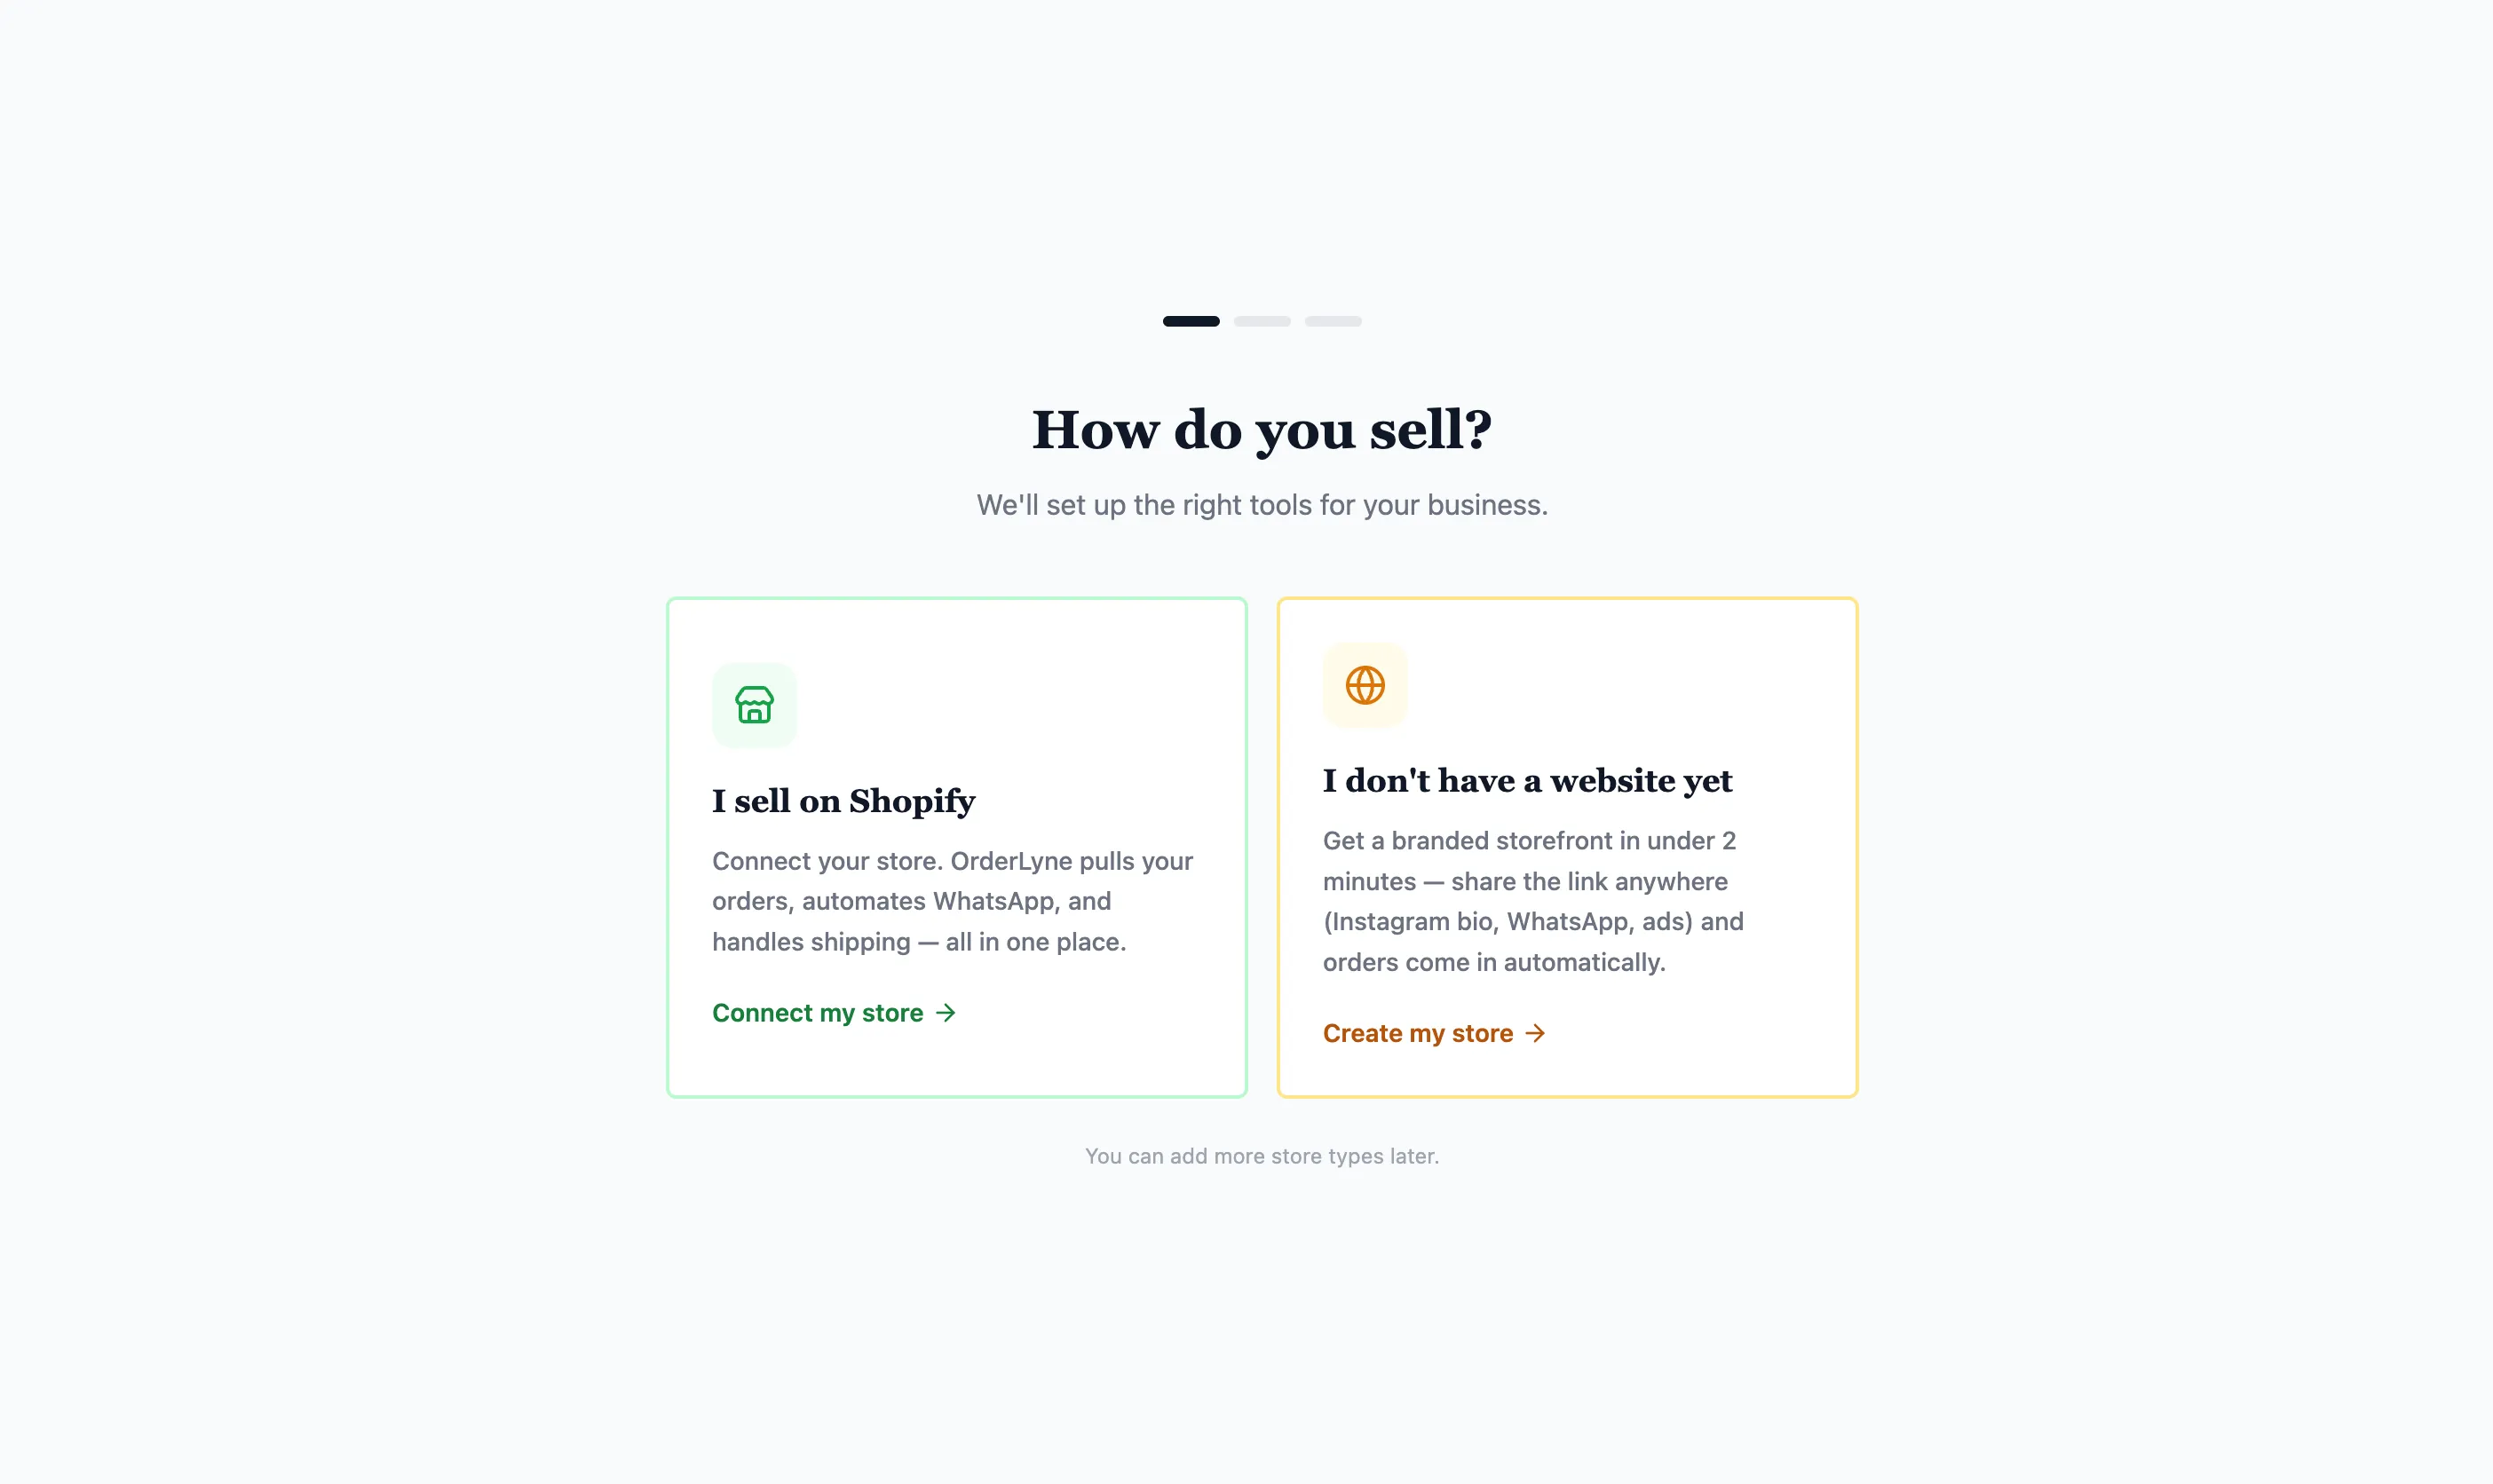
You can add the other type of store later — pick whatever matches your situation today. The rest of this guide assumes you picked “I don’t have a website yet” and are creating a new storefront. If you’re connecting Shopify instead, see Connecting your Shopify store.
Step 3 — Your business name
Section titled “Step 3 — Your business name”Next screen asks for two things:
- Business name — what shows up on invoices, emails, and customer-facing receipts
- WhatsApp number — your active WhatsApp number, 10 digits (we’ll add the +91 country code automatically)
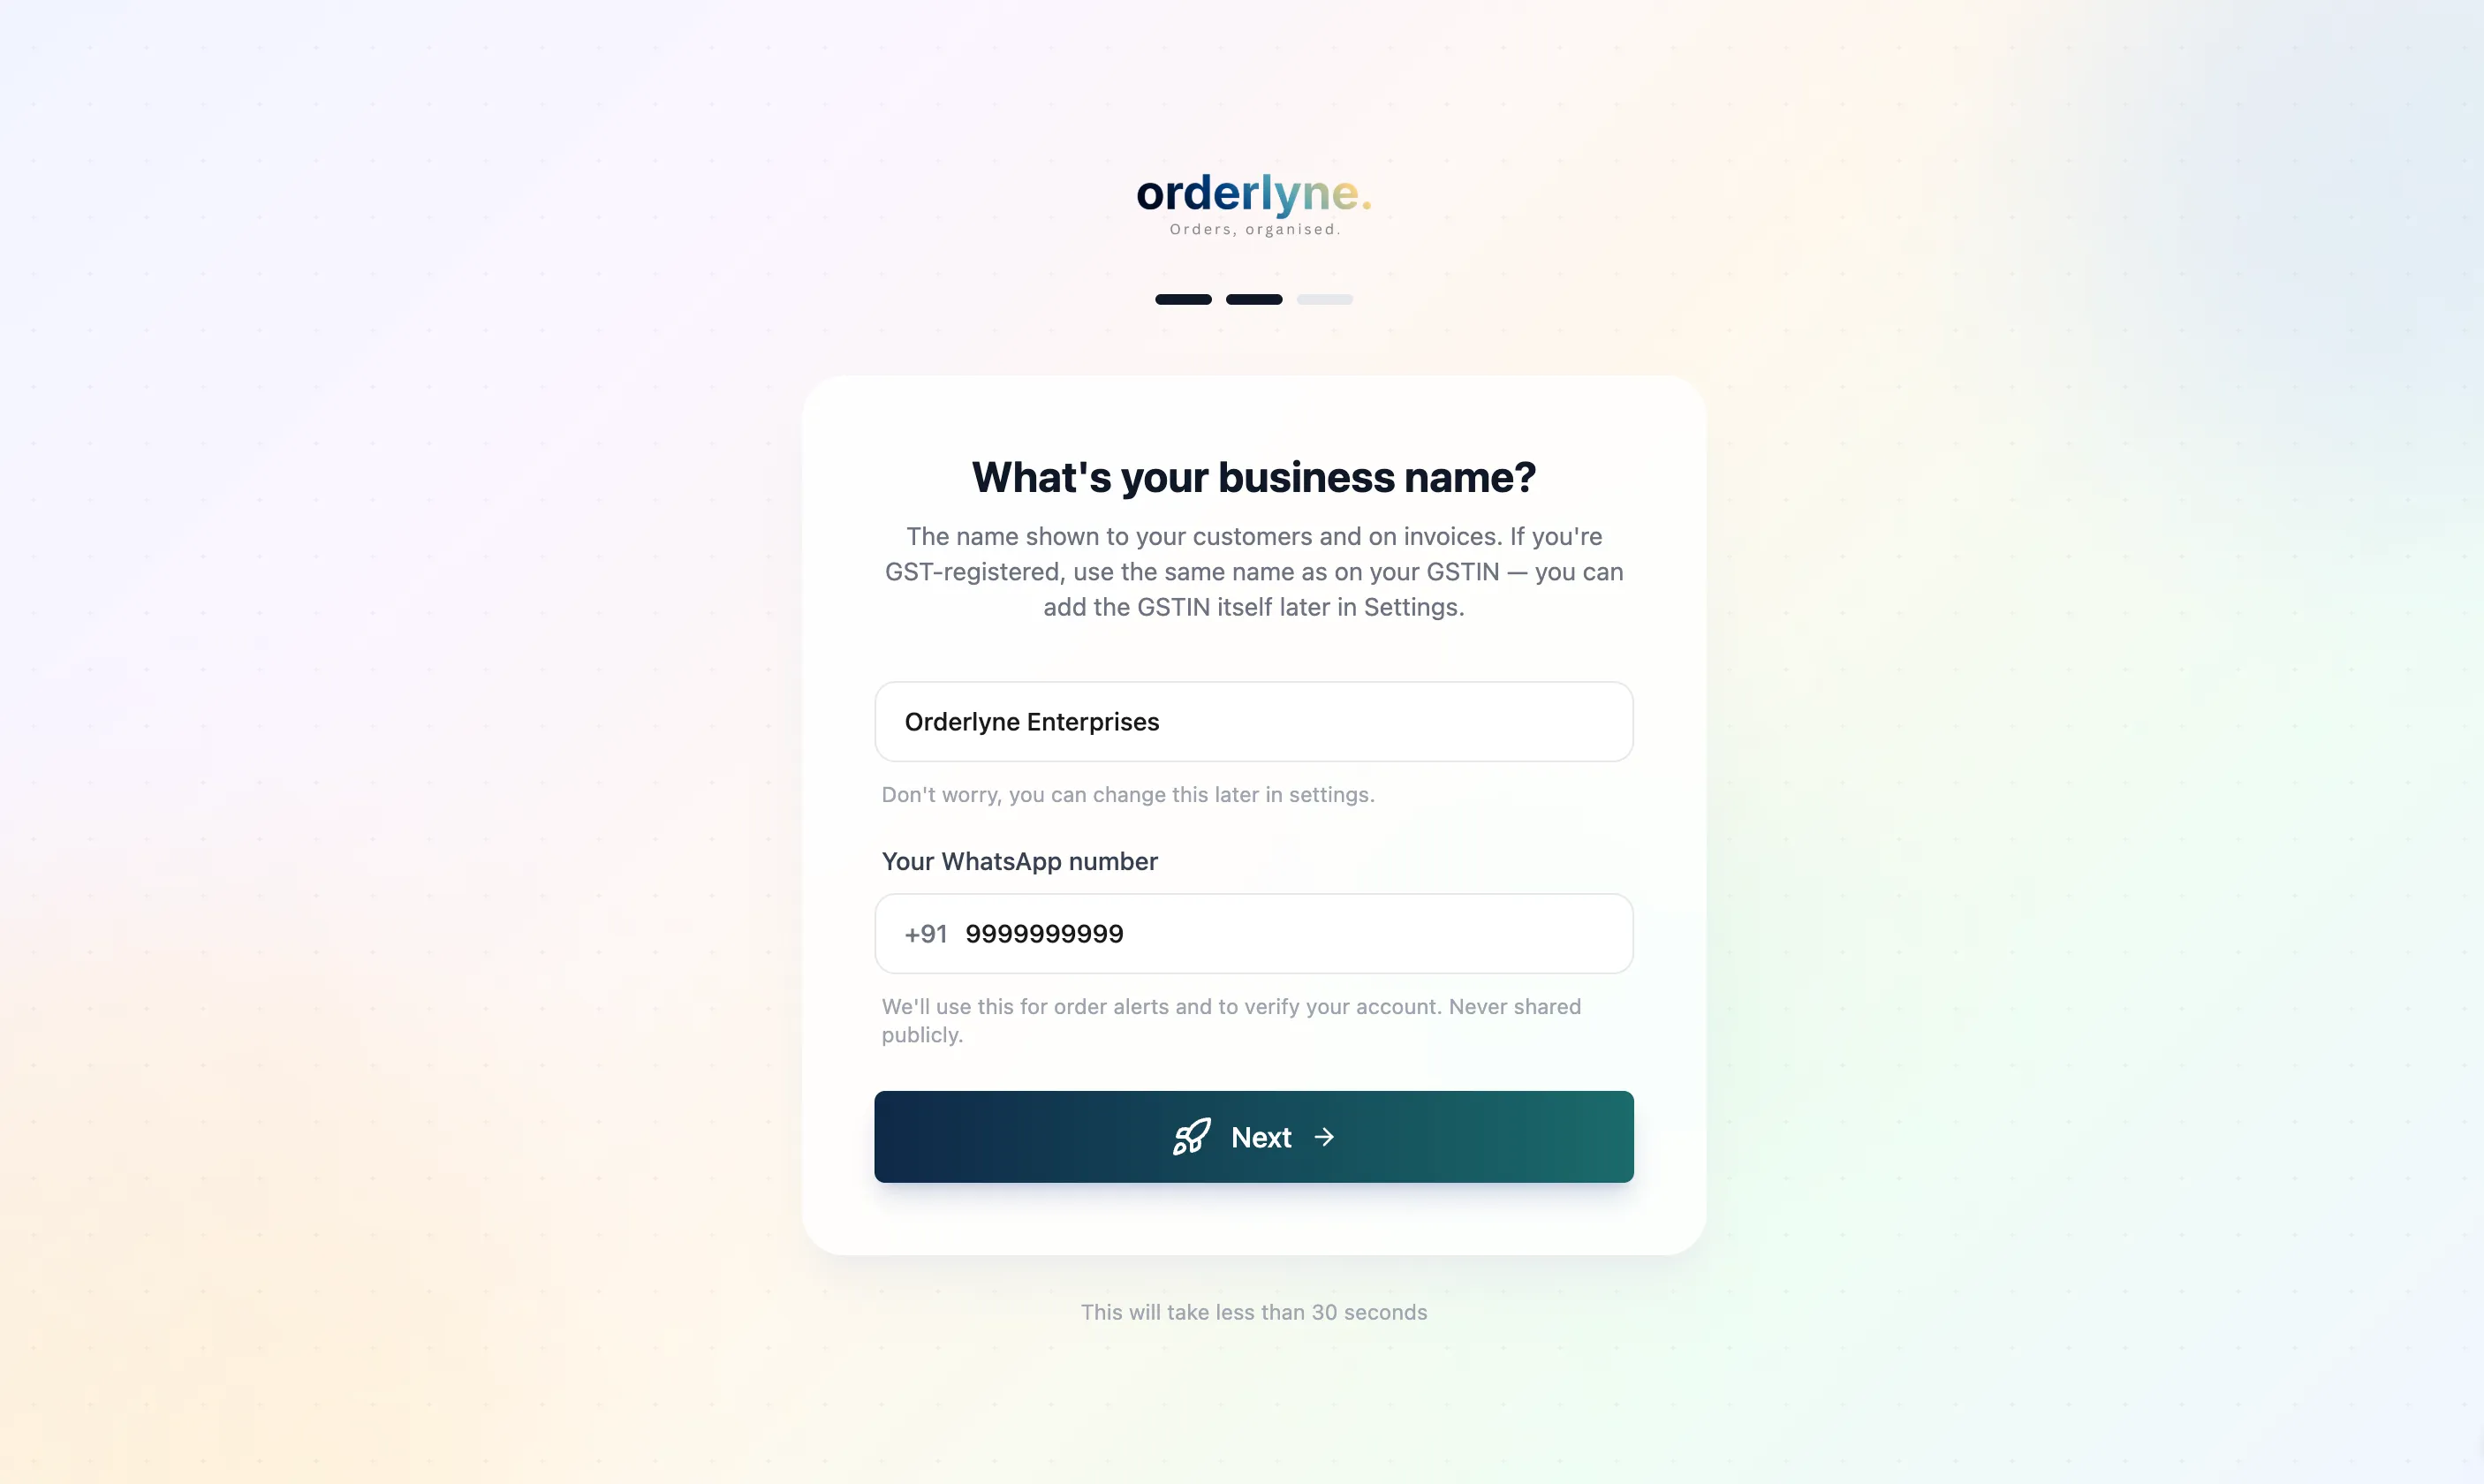
Both are required. The business name can be edited later from Settings, but you’ll save yourself a step by getting it right now.
A note on the business name: if you’re GST-registered, use the same name as on your GSTIN — that way invoices generated by OrderLyne match your registration. If you’re not registered, use whatever name you’d want customers to see on receipts.
Step 4 — Create your store
Section titled “Step 4 — Create your store”The final onboarding step is creating your storefront. Three things to set:
- Store name — the name displayed at the top of your storefront and across the dashboard. Usually the same as your business name, but it can be different (some brands have a legal entity name and a customer-facing brand name).
- Storefront URL — your public URL where customers will visit. Auto-generated from your store name (for example, “Glow Studios” becomes
glow-studios.orderlyne.in), but you can edit it before saving. Pick something short and memorable — this is what goes in your Instagram bio while you’re getting started. If you have your own domain (or plan to buy one), you can point it to your store anytime from Settings → Domains; the OrderLyne subdomain stays as a backup. - Niche — the category of products you sell. Pick the closest match from the dropdown. We use this to recommend themes that fit your category. You can change it anytime from Store Settings.
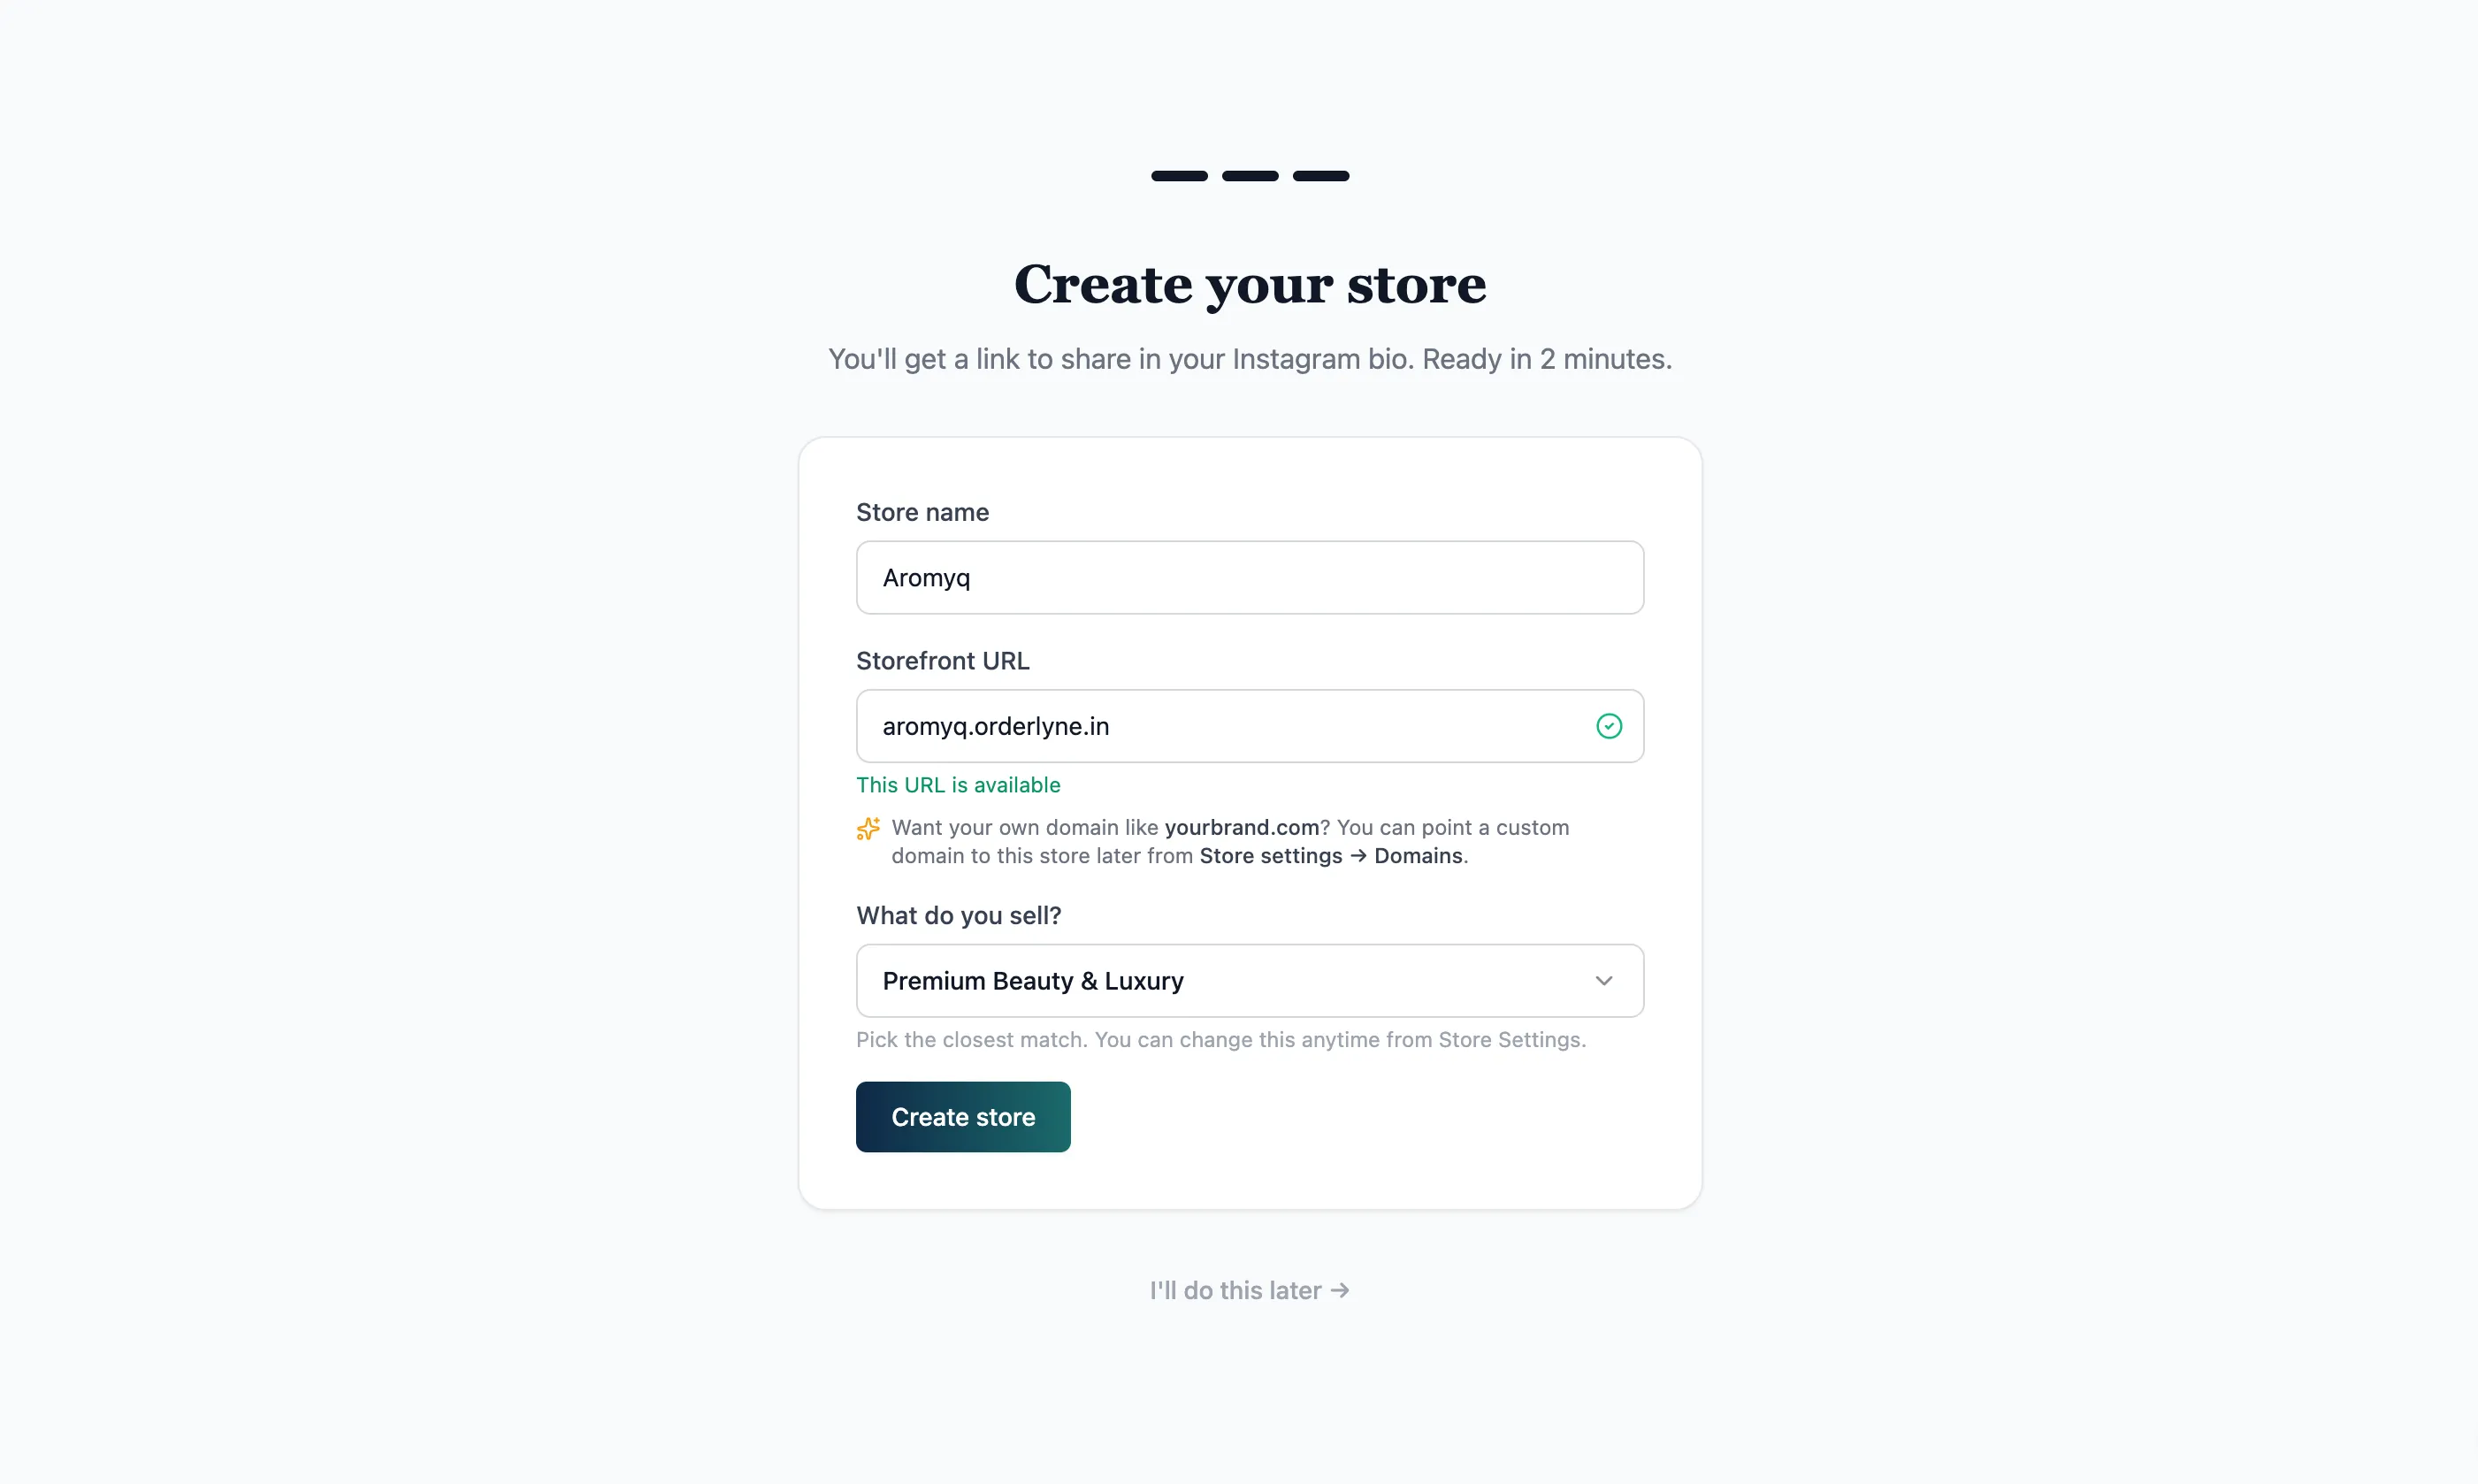
Once you click Create store, OrderLyne sets up your storefront, seeds it with sample data so the dashboard isn’t empty, and takes you to a celebration screen with your live URL.
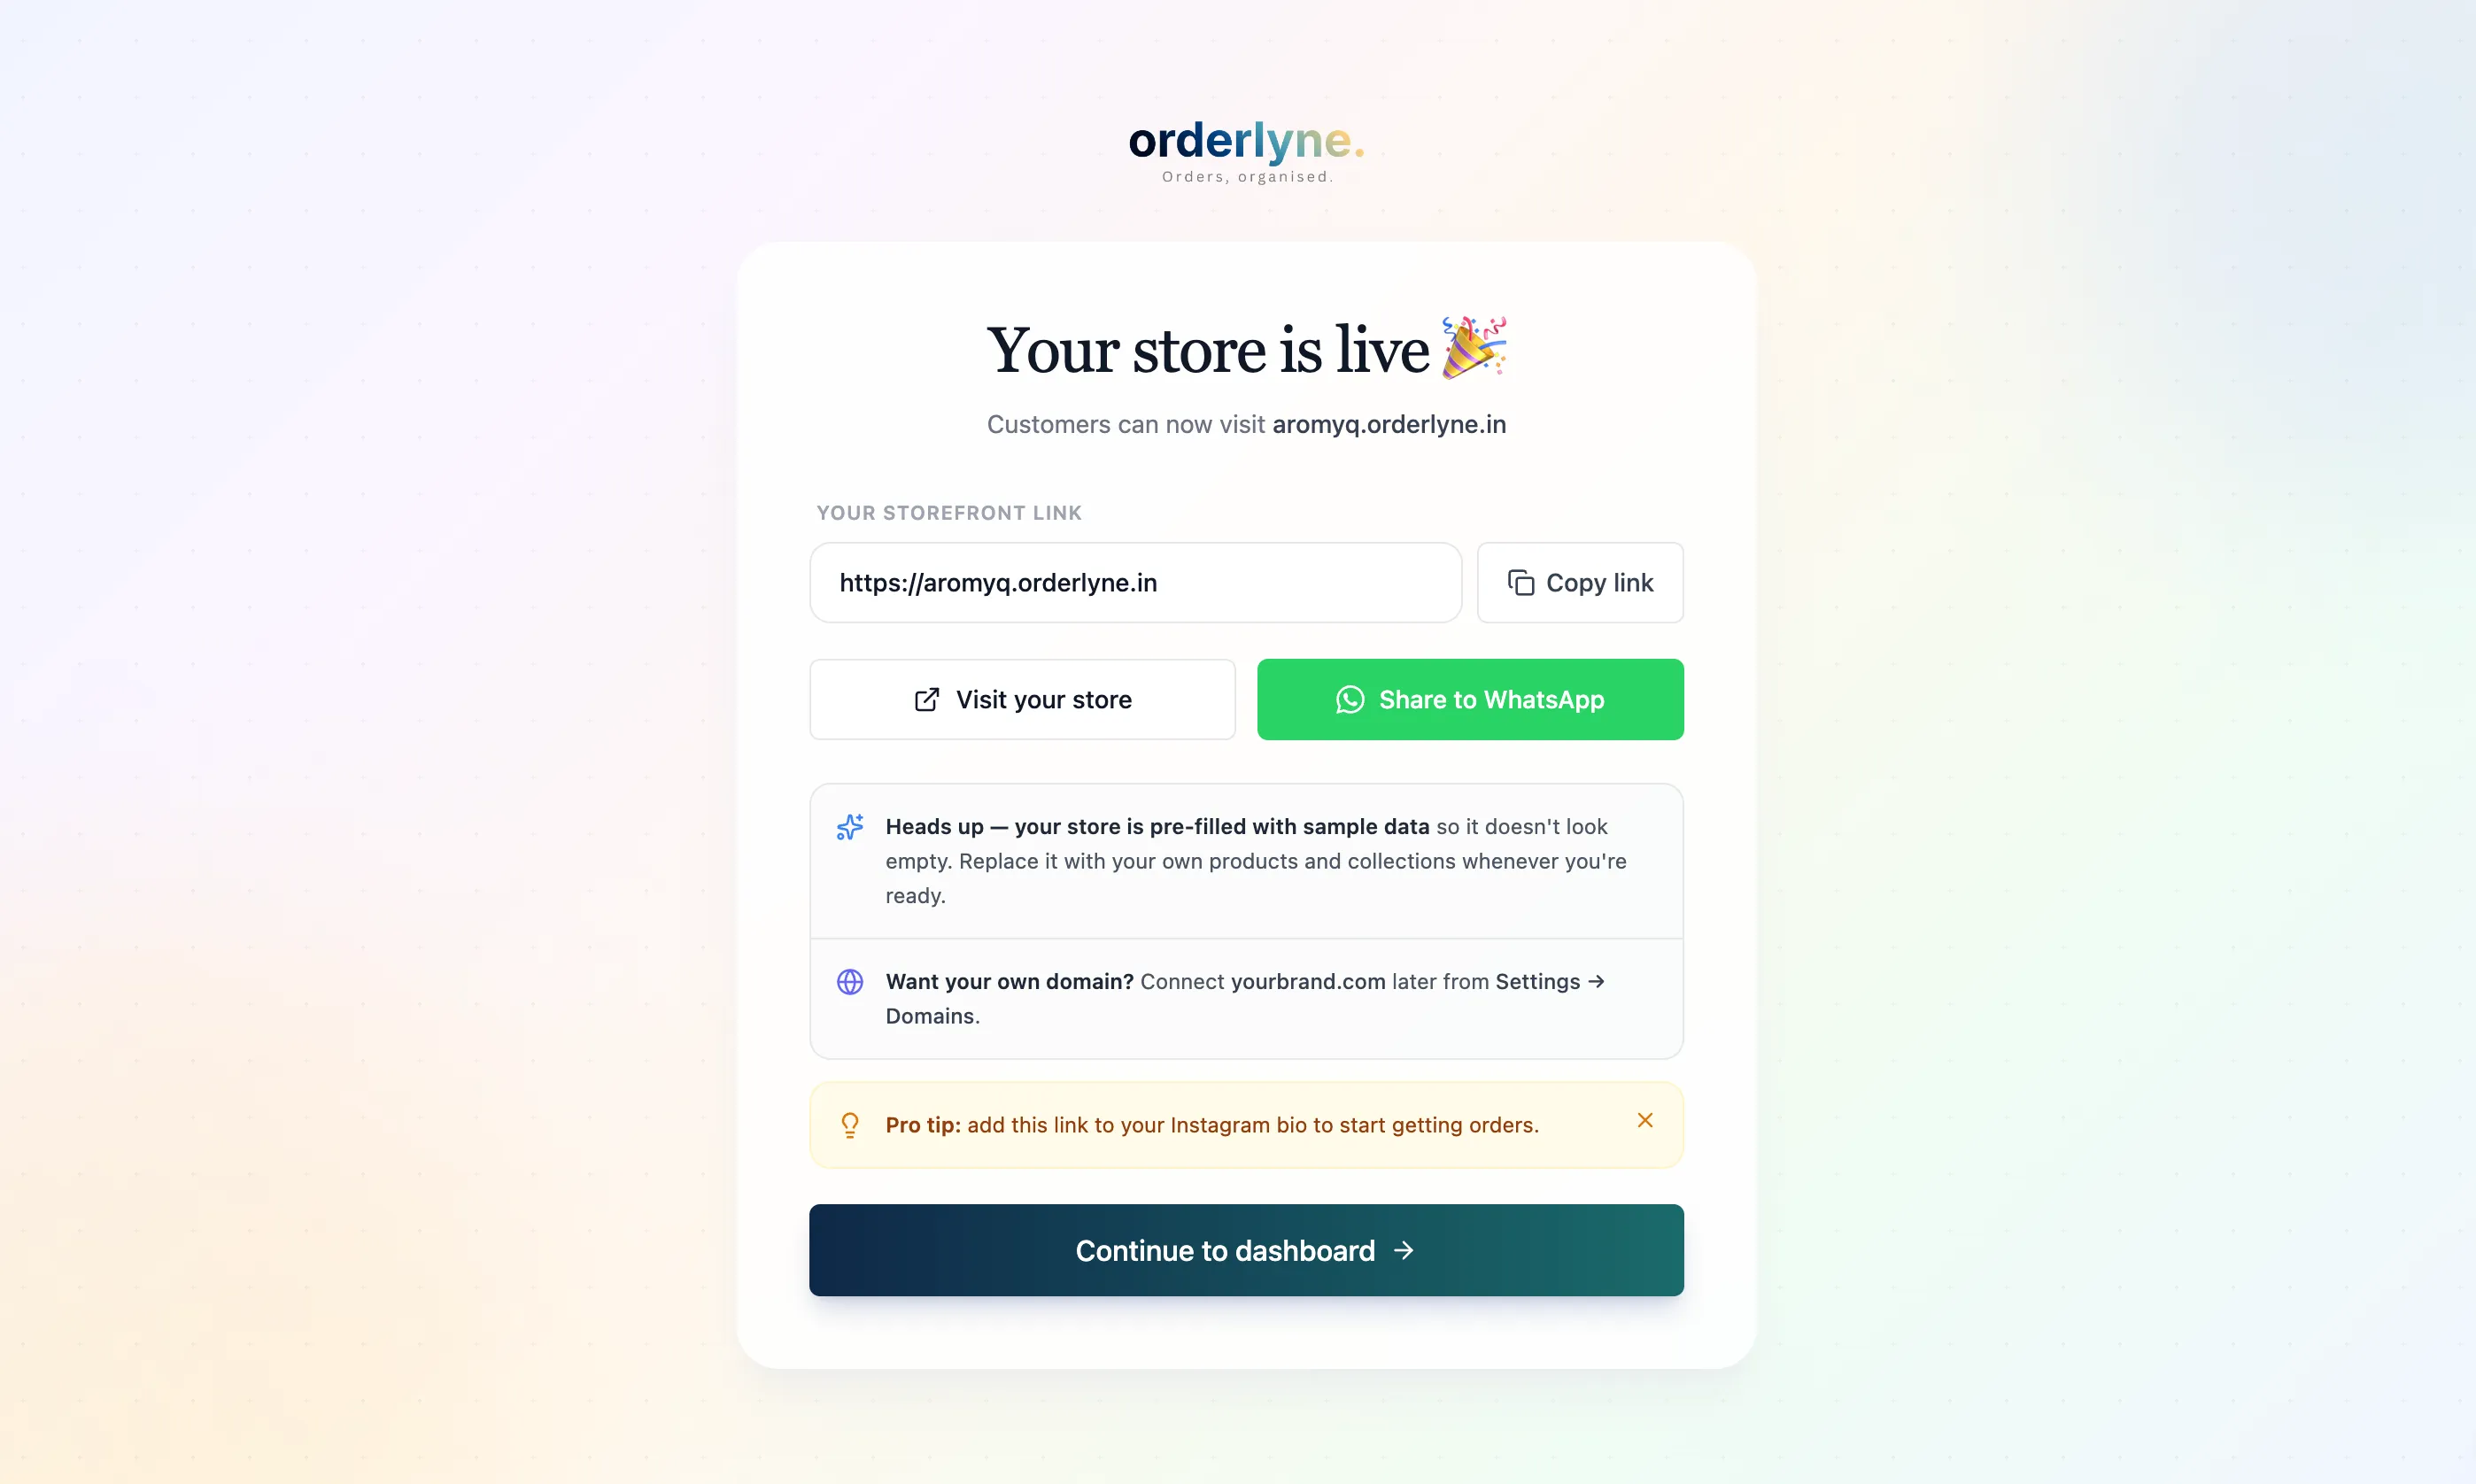
Step 5 — You’re live
Section titled “Step 5 — You’re live”You’ll land on a confirmation screen showing your storefront URL — something like https://yourstore.orderlyne.in. From here you can:
- Copy the URL to paste into your Instagram bio
- Visit your store to see how it looks to customers (it’ll have sample products initially — those are demo data, see below)
- Continue to dashboard to start setting things up properly
What’s in your store right now
Section titled “What’s in your store right now”When OrderLyne creates a new store, we seed it with sample data so you can see what a working store looks like:
- 5 sample products with placeholder images and descriptions
- 3 sample collections showing how products are grouped
- 2 sample orders so the orders section isn’t empty
- 2 sample customers so the CRM has something to show
This data is clearly marked as demo. You can browse the dashboard, see how everything connects, click around without breaking anything. When you’re ready to add your real products, the demo items can be deleted in bulk from the Products page — or just left alongside your real products until you’re comfortable removing them.
What’s next
Section titled “What’s next”You have a live storefront. The next things to do, roughly in order of impact:
- Add your first product — replace the demo products with your actual catalog. Even one real product makes the store feel real.
- Customize your storefront — pick a theme that fits your brand, upload your logo, set your colors.
- Connect WhatsApp Business — turn on order confirmations and shipping updates. This is where OrderLyne starts saving you real time.
- Configure a courier — set up at least one courier so you can ship orders that come in.
- Share your store on Instagram — the URL is what makes your Instagram bio actually shoppable.
You don’t have to do all of this on day one. Get one or two pieces working, take a real test order, and grow from there.
Stuck on a specific step? Reach out at hello@orderlyne.app — usually a few hours response time during India working hours.